Pages

Friday, March 30, 2018

Scrapping for Less 1 Year Anniversary Hop


Hello crafty friends! Today I am here with a special post and video for the Scrapping for Less Kit Club 1 Year Anniversary Blog Hop. I have been fortunate to guest design for them twice over the past year and have really enjoyed their kits on both occasions. Today we are revealing and sharing inspiration for the March Flavor of the Month Kit. I have a video sharing some inspiration from the kit as well as more information under the video.


A message from Scrapping for Less: It’s All About Ice Cream this month here at Scrapping for Less for the March Flavor of the Month kit. Can you believe it has been one year since we began this card kit adventure? It has been a wild ride, but a very exciting ride!! We have grown with our subscriptions this past year by 8000%…and yes that is 8K percent growth! Baffles my mind! We are excited about this growth opportunity and even more excited with the new additions to our team…Keep looking to Scrapping for Less for some great inspiration in the future! Now onto these fabulous ladies, and our wonderful guest designers for what they have created for you with this super cute ice cream kit this month!


For this hop I received one of the collections from the kit (Collection 2) so be sure to hop along to see all the kit contents. I worked with Ice Cream Marci and from La La Land crafts as my main image on several cards. Copic colors for Marci (Skin: E31, 33, 35, 37) (Hair E13, 15, 19) (Dress YG 11, 13, 17 and R85, RV34, RV11)


I had fun coloring Marci in different colors and outfits. I even paper pieced her outfit for one card. It led to a pattern heavy card, but I like it. Copic colors for Marci (Skin: E31, 33, 35, 37) (Hair E13, 15, 19) 


My sister requested this color combination inspired by her favorite Disney princess, Cinderella. Copic colors for Marci (Skin: E11, 21, 00) (Hair Y35, 13, 11) (Dress B00, 02, 12)


I also thought the Banana Split level Scrapping for Less exclusive stamp set was a lot of fun. So many great sentiments and this adorable ice cream sundae. 


I took my color cues from the patterned papers by Pink and Main. I created some simpler cards to share because I decided to use up my whole collection for today's post. I am a big fan of finishing up a paper pad or kit when possible. 


Next up on the hop is Lisa Williams but you can always head to the Scrapping for Less Blog to start at the beginning. 


Don’t forget to enter in the Rafflecopter! And remember the best way to be reassured to receive a kit is to have a monthly subscription! Thanks again for hopping with us. Happy Crafting!

Distress Ink Stripes with Hello Bluebird Stamps


Hello crafty friends! I wanted to share a video featuring the adorable stamps from Hello Bluebird Stamps

I was so excited to color all the images from the Jungle Littles stamp set that I decided to some up with a clean, simple, easy card design that would allow each critter to star on their own card. I decided on some Distress Oxide Ink stripes. Some simple Post-It Note tape masking made these quick and fun to create. Each animal for a unique color of stripes and an accessory or two from the stamp set to finish off the card. The large sentiment is from the Spring Script stamp set.


Wednesday, March 28, 2018

Neat and Tangled Party Ensemble Challenge


Hello crafty friends! Today I have an entry for the latest Neat and Tangled Challenge to make a party ensemble. I was inspired to start with Wild Ones because it was a birthday set featuring my favorite thing to color: critters. I decided to make a card, a cake topper, a treat bag, and a name plate. For more information check out my video below:


I decided to come up with a simple soft color scheme that could be used throughout and was inspired by the animals as well as the treats I had.


I kept my cake topper simple because it is essentially disposable after the party, but I wanted the scale of it to match the cake and be noticed.


I pulled the yellow of the animals into the ensemble a bit more with some yellow candies and again kept the decoration simple as the candy is really more the focus.


However I felt like party guests would get a kick out of a personalized name tag and took a bit more care with this piece. I would make the name tags longer or shorter to accommodate the length of the person's name, but I thought this was another great place to include the party animal sentiment as these name tags are literally designating all the party animals who are attending. The Alpha dies from Neat and Tangled are perfect for this because they are tall and narrow and so they can spell names and make sentiments while still working on small pieces.


I spent the most time on my card for the special person. I really wanted to use the Big Hugs die to balance out the large giraffe stamp and thought the Balloon Duo stencil was a perfect background and a way to incorporate the green from my color scheme.The tiny birthday sentiment from Big Top Birthday modified the Big Hugs sentiment and I look forward to using that trick again.


I hope you enjoyed my party ensemble. I have loved seeing all the other talented designers in this challenge and wish the best of luck to everyone!


Tuesday, March 13, 2018

Distress Stain Background with Honey Bee Stamps

Card featuring Honey Bee Stamps Swimming By Mermaid by Jess Crafts

Hello crafty friends! Today I have a card and video featuring Honey Bee stamps. I picked up my first Honey Bee Stamp sets during a recent haul from Kat Scrappiness. When I saw the Honey Bee Stamps #BEEGreen challenge I knew it was the perfect time to finally color up this gorgeous mermaid I had picked up. I am sharing my process in the video below:


This #BEEGreen is an Instagram challenge officially so be sure to head over to their IG page and play along. I also thought this was perfect for the Simon Says Stamp Wednesday Challenge Girl Power so I'm linking it up there as well.

Card featuring Honey Bee Stamps Swimming By Mermaid by Jess Crafts

If you'd like to pick up anything from the Kat Scrappiness store you can use the code Jess10 for a discount.

Monday, March 12, 2018

10 Cards 1 Kit | Simon Says Stamp March 2018

Cards with March 2018 Simon Says Stamp Choose Joy Card Kit by Jess Crafts

Hello crafty friends! Today I have the cards I made with my Simon Says Stamp March 2018 Kit to share with you. In the video below I am sharing how I made these 10 cards with the kit. I tried to keep the extra supplies to a minimum but did use markers for coloring, masking paper and black ink. For more information on the cards check out my video. 


I've included pictures of the complete cards in case you want to save them for future reference and all cards are A2 sized. Links to supplies are also at the bottom of the post.

Cards with March 2018 Simon Says Stamp Choose Joy Card Kit by Jess Crafts

Card with March 2018 Simon Says Stamp Choose Joy Card Kit by Jess Crafts

Card with March 2018 Simon Says Stamp Choose Joy Card Kit by Jess Crafts

Card with March 2018 Simon Says Stamp Choose Joy Card Kit by Jess Crafts

Card with March 2018 Simon Says Stamp Choose Joy Card Kit by Jess Crafts

Card with March 2018 Simon Says Stamp Choose Joy Card Kit by Jess Crafts

Card with March 2018 Simon Says Stamp Choose Joy Card Kit by Jess Crafts

Card with March 2018 Simon Says Stamp Choose Joy Card Kit by Jess Crafts

Card with March 2018 Simon Says Stamp Choose Joy Card Kit by Jess Crafts

Card with March 2018 Simon Says Stamp Choose Joy Card Kit by Jess Crafts

Card with March 2018 Simon Says Stamp Choose Joy Card Kit by Jess Crafts

Card with March 2018 Simon Says Stamp Choose Joy Card Kit by Jess Crafts

Thursday, March 1, 2018

31 Cards with Doodlebug Pot O' Gold Collection


Hello crafty friends! Today I have another 6x6 Paper Pad tutorial featuring Doodlebug. I am obsessed with Doodlebug 6x6 pads because it is so easy to create a bunch of cards without using many extra supplies. I think their designs are adorable and I can easily whip up a bunch of cards for card drives like Cards for Hospitalized Kids. If you want more info on donating card please check out my Card Drive Resources page. So today I'm using the Doodlebug Pot O' Gold 6x6 paper pad while making 20+ cards! To see it all in action check out the video.


I made 4 of many designs because this paper pad came with 4 of each sheet but there are some unique cards. Keep scrolling to see pictures of different designs and get some measurements. 

Card with Doodlebug Design Pot O Gold by Jess Crafts
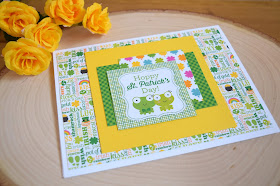
Measurements for this card (in inches): card base 5 1/2 by 5 1/2, largest layer 5 1/4 by 5 1/4, sentiment layer 4 1/8 by 4 1/8 (Made 4)

Card with Doodlebug Design Pot O Gold by Jess Crafts
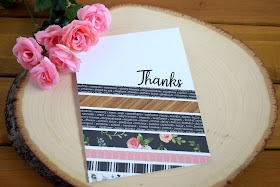
Measurements for this card (in inches): A2 (4 1/4 by 5 1/2) card base, largest layer 4 by 5 1/4, rectangle patterned paper 2 by 3, square cut aparts 2 by 2, yellow cardstock 3 1/2 by 3 1/2 (Made 4)

Card with Doodlebug Design Pot O Gold by Jess Crafts
Measurements for this card (in inches): A2 (4 1/4 by 5 1/2) card base, square cut apart 2 by 2, yellow cardstock 2 1/4 by 2 1/4, strips 3/4 by 4 (Made 3)

Card with Doodlebug Design Pot O Gold by Jess Crafts
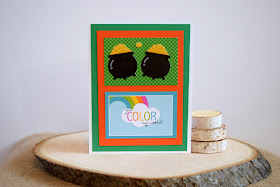
Measurements for this card (in inches): A2 (4 1/4 by 5 1/2) card base, square cut aparts 2 by 2, rectangles 2 by 3 (Made 4)

Card with Doodlebug Design Pot O Gold by Jess Crafts
Measurements for this card (in inches): A2 (4 1/4 by 5 1/2) card base, largest layer 4 by 5 1/4 (create with 2 2x6 strips trimmed), strip 2 by 5 1/4, square cut apart 2 by 2, yellow cardstock 3 1/4 by 3 1/4 (Made 2)

Card with Doodlebug Design Pot O Gold by Jess Crafts
Measurements for this card (in inches): A2 (4 1/4 by 5 1/2) card base, largest layer 4 by 5 1/4, strip 2 by 5 1/4, blue cardstock 4 1/4 by 3 (Made 2)

Card with Doodlebug Design Pot O Gold by Jess Crafts
Measurements for this card (in inches): A2 (4 1/4 by 5 1/2) card base, largest layer 4 by 5 1/4, but apart 2 by 3, shamrock strips 5/8 by 2, rainbow strips 4 by 1/4 (Made 4)

Card with Doodlebug Design Pot O Gold by Jess Crafts
Measurements for this card (in inches): A2 (4 1/4 by 5 1/2) card base, largest layer 4 by 5 1/4, rectangle cut apart 2 by 3, square cut apart 2 by 2 (Made 4)

Card with Doodlebug Design Pot O Gold by Jess Crafts
Measurements for this card (in inches): A2 (4 1/4 by 5 1/2) card base, square cut apart 2 by 2, strips approx 3/8 by 5 1/4 or 3 (Made 1)

Card with Doodlebug Design Pot O Gold by Jess Crafts
Measurements for this card (in inches): A2 (4 1/4 by 5 1/2) card base, square cut aparts 2 by 2, bottom rectangles 1 1/8 by 2 (Made 1)

Card with Doodlebug Design Pot O Gold by Jess Crafts
Measurements for this card (in inches): A2 (4 1/4 by 5 1/2) card base, largest layer 4 by 5 1/4, small rectangles 2 by 3, orange cardstock 4 3/4 by 3 1/2 (Made 1)

Card with Doodlebug Design Pot O Gold by Jess Crafts
Measurements for this card (in inches): A2 (4 1/4 by 5 1/2) card base, small rectangles 2 by 3, strips 4 by 7/8 (Made 1)