Hello crafty friends! Today I want to share a brief tutorial on how I cut SVG files with my Brother Scan N Cut 350 wireless enabled machine. I had to buy an additional card to activate the wireless ability on my machine but if you have the machine without that addition I believe you can plug the machine into your computer or use a USB drive to transfer files. I will only be covering wireless in this tutorial but most of the steps would be the same.
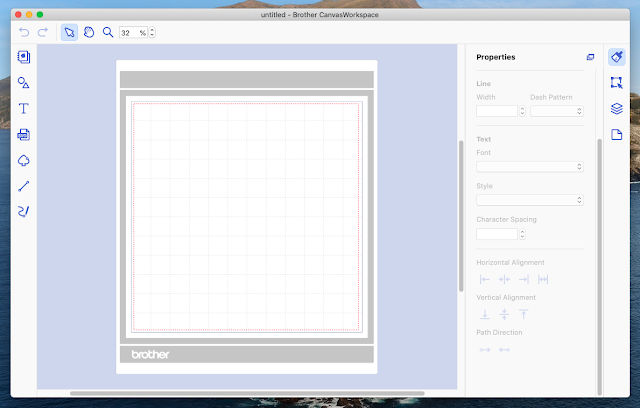
1. Open the Brother Canvas Workspace software or online tool.
2. Click the SVG option on the left side.
3. Locate the SVG file on your computer.
4. Adjust the size of the image to your liking. Each square of the grid represents 1" square on your mat. Be sure to load the cardstock, paper, etc in the right spot and that the piece is large enough to cover the cutting area.
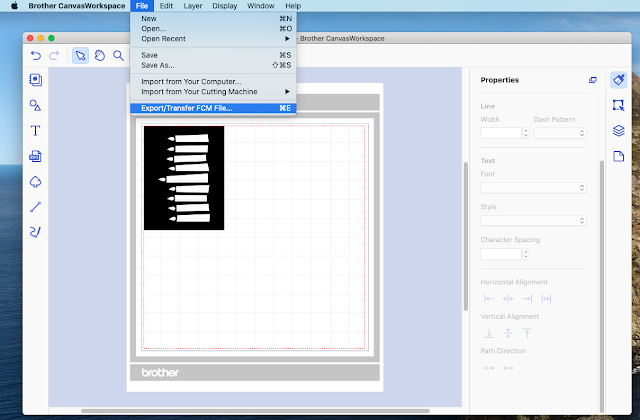
5. Navigate to the File -> Export/Transfer FCM File option.
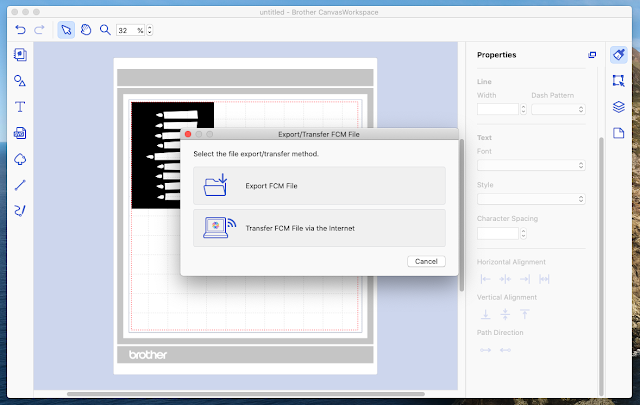
6. Choose the option appropriate to you. If you are also connected wirelessly then select "Transfer FCM File via the Internet." While I have not tested the other methods, it is my understanding you can choose "Export FCM File" to transfer via a USB drive or a ScanNCut that is plugged into a computer directly.
7. Go to the machine, turn it on and load the mat with appropriate cardstock or you medium of choice. If the image is in the top left of the Canvas workspace grid, the material should be in the top left of the mat. Choose the Pattern option.
8. Click on the symbol highlighted in red. It looks like a cloud with a dotted arrow to a line drawing of a ScanNCut machine.
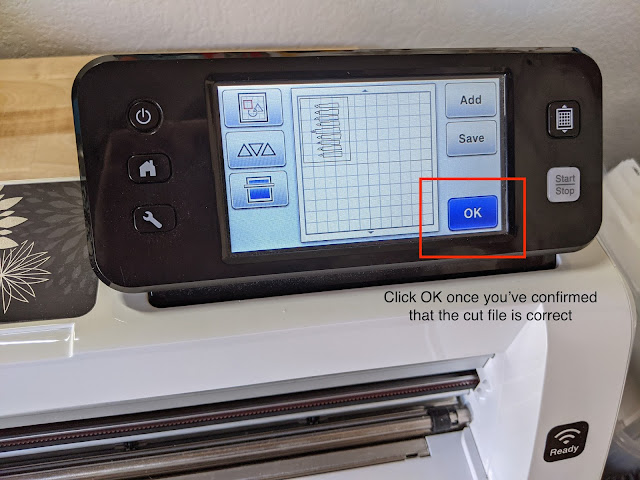
9. Your Canvas creation should appear on screen. Once you have confirmed it is correct, click the OK button.
10. On the next screen, choose the Cut option and then Start. Your machine will get to work cutting your image and you'll be ready to get crafting.
I hope this was helpful. Please leave any questions in the comments or by filling out the contact me form and I will try to answer them.





No comments:
Post a Comment
Thanks for stopping by and taking time to comment!